Fizzy Cherries

image

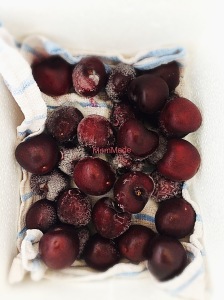
I had some dry ice yesterday from buying ice cream cake. Instead of adding water to it and watch it form clouds like we usually do, I decided to try making fizzy fruit.  It’s really easy and interesting to eat.

In a cooler box, fill the bottom with dry ice. Lay a towel over it and place your fruits on the towel. Put the lid on the box and seal it. I left it for about 18 hours. When I finally got to it, the dry ice had already disappeared. And I got myself fizzy cherries. 😃👍🏻


Brownie Cookies

image


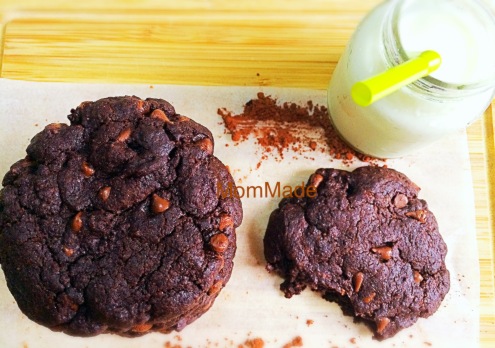
Brownie cookies is my version of ultra chocolate chewy cookies.  I was told by my DD that chocolate helps improve one’s math. Heheh.  I know for a fact that it makes one happy.  I can’t be nibbling on an ultra chocolatey chewy cookie and be angry.  I realised that today as my mom and I were sitting on a bench outside, both of us nibbling on the cookie and we were both smiling.

But it’s fattening, you say?  I agree.  So I only have them in small doses. Like half a cookie each time (self-discipline!). Since it’s so dense and sweet, it’s not to be eaten like the way Cookie Monster gobbles his cookies.  It’s to be nibbled and savored slowly.  Never in a hurry.
image

Brownie Cookies (makes 16)

160g plain flour

50g cocoa powder

1/2 tsp baking soda

1/4 tsp salt

120g melted butter

170g white sugar

1 large egg

2 tsp vanilla essence

1/2 tsp instant coffee powder

1/2 cup chocolate chips

Melt butter in a medium size pot.  Add cocoa powder to hot butter.  Leave to cool.  Then stir in the egg, sugar, vanilla, coffee powder and salt.  Next, add in the flour and baking soda and stir to combine.  Lastly, add in the chocolate chips.

Chill dough in the fridge for at least half an hour.

Divide dough up into 16 equal parts.  Flatten the dough to about 1 cm thickness and place on a lined cookie sheet, making sure there is enough room for expansion.  Bake in a preheated oven of about 180 c for 9 min.

Leave to cool on pan.  Store in an airtight box.


This makes a soft, chewy, very slightly cakey, ultra chocolatey cookie.  I was thrilled to find it still soft and chewy the next day (might be attributed to our humid weather, I dunno).

Take my advice and eat it slowly.  Coffee, tea or milk not necessary.  You don’t really want to wash away the taste of chocolate in your mouth now, do ya?


Knitted Pillow Case

image

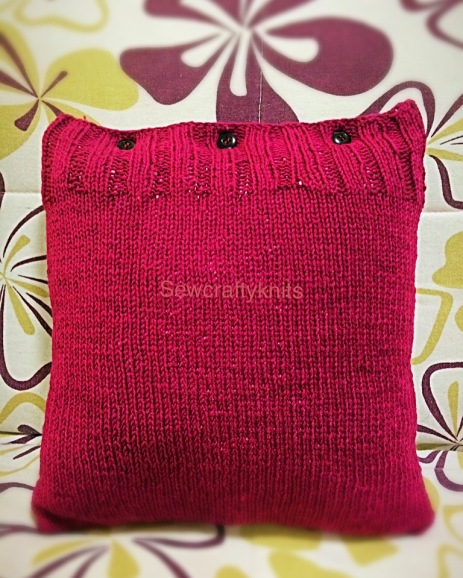
This is such a simple knitted pillow and yet it had me stumped for quite a while.  What I couldn’t figure out was how to make it into a removable case.  It’s gonna need buttons and I don’t know why I just couldn’t figure out the button part.  Like how?  Should I make a flap like envelope style? Should I line it? Install zip, velcro instead of buttons?  The answer was so easy but I didn’t get it.  I probably wasn’t thinking hard enough.  I was only just thinking about it on and off, thus the answer only hit me in the face months later. duh.

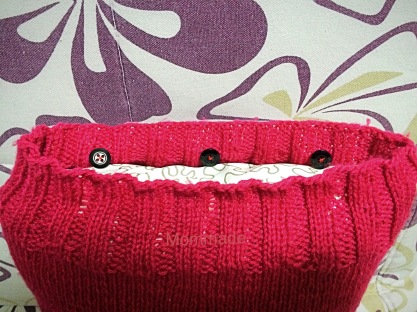
It’s simple.  Forget about envelop flaps.  It’s not necessary and the finish is not as nice. Just knit a burrito pocket and sew on 3-4 buttons at the top on the WS.  Coz it’s knitted with a size 4.5mm needle, the holes are big enough and stretchy enough to stretch to fit in the buttons! Viola! That’s it! Button-holes not even needed, unless you are looking at mega sized buttons (not advised).

Knitted Pillowcase

4.5mm circular needle

8 ply acrylic yarn (about 100g)

3-4 buttons

14″ square pillow

*This pattern will be knitted in a circle to minimize sewing.

*Gauge for 10 cm square is about 17 st by 26 rows.

Cast on 110 stitches. Knit 3, purl 2 for about 20 rows.  Then change stitches to all knit.  This will give you stockinette stitch.  Continue this for about 75 rows.  Cast off loosely, leaving a long tail (about 1 m).  This tail is for sewing up the bottom of the pillow case.

Now all that’s left is to sew on the buttons. Make sure that the buttons can go through the stitches first.

image

Position the buttons on the inside of the case and sew.

image

Just squeeze the button through the gap in the stitch.

image

Easy! Done! And they close up nicely and neatly. Unlike the following, which were made using envelope style.  The flap is a waste of time and yarn.  What an eye-sore.  I think I’m gonna *frog the flap.

image

Happy knitting!

*Frog goes ribbit.  Sounds like rip it!


White Chocolate Raspberry Ice Cream

image

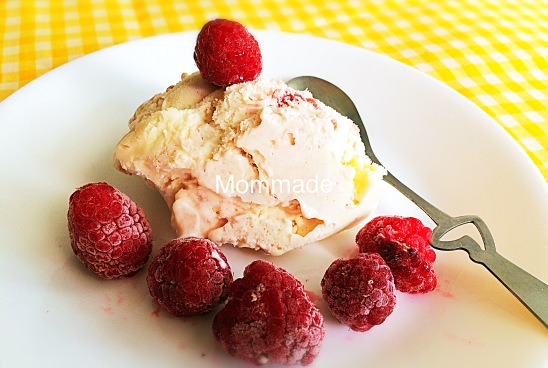
It’s been so hot these days.  Thus we have started to step up on our juice, popsicle and ice cream intake.  Heheh.

This is what I made recently.  It’s easy and fast.  Ice cream tastes really smooth and creamy with bits of yummy white chocolate surprises inside.  It’s a bit sweet but the tartness of the raspberries help to balance things out. Delicioso!

White Chocolate Raspberry Ice Cream (no churn)

1 litre dairy cream

1 can condensed milk

1/2 jar raspberry jam

chopped white chocolate

frozen raspeberries

To make sure that the cream is very cold, place in the fridge for about an hour or two but not more than that.  Chill everything, including condensed milk, jam and chocolate.  Chill the whisk and bowl if you can.

Whisk cream for about 5 min.  Then add in the condensed milk and continue whisking until cream is fluffy.  Pour into a freezer container and stir in the jam, white chocolate and frozen raspberries.

Freeze until firm.