Chinese Dumpling Kee Chang

EBB981E6-CA59-4691-B772-57D648881A66
My mom taught me how to wrap these when I was in my teens. It’s time for me to pass it on to GG.
You can watch YouTube videos on how to wrap. At present, my account doesn’t support videos.

3CE72E8A-4689-48F0-A7CD-7545E01C1C95

This is Kee. Looks like pieces of fishball-sized rocks. It dissolves quite readily in hot water. Just take one and dissolve in about 100ml hot water. You can get Kee from the wet market or local grocery stores during the season. That’s in May/June.

Kee Chang (makes about 24)

8 cups glutinous rice (or about 1kg give or take)

1 kee dissolves in 100ml hot water

1 Tbsp oil

25-30 bamboo leaves (better to have more coz some may be torned)

butcher’s string or raffia

1. Soak the glutinous rice and leaves overnight. The next day, drain the rice and pour in the Kee solution and oil to soak for about an hour.
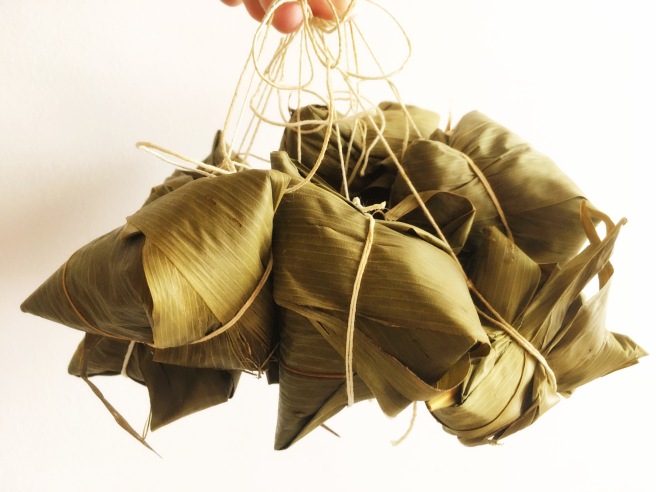
2. Prepare the strings by cutting them into about 1 m x 4. Fold each one into half and make a knot at the top for hanging. Split each string length wise. Now you’ll get about 6 strings per batch. Total 24.

EA0ED15C-6B5D-4664-BC68-D21C24AB742A
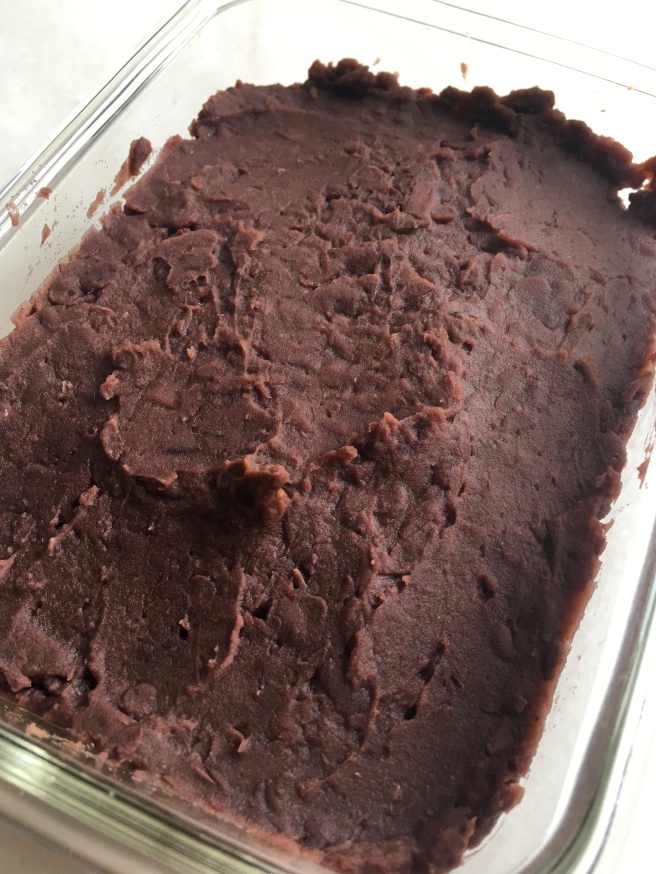
3. Now you are ready to wrap. You have the option to make it plain rice or stuff it with red bean paste.
FD091555-4F03-45D0-A98E-8986957597E6

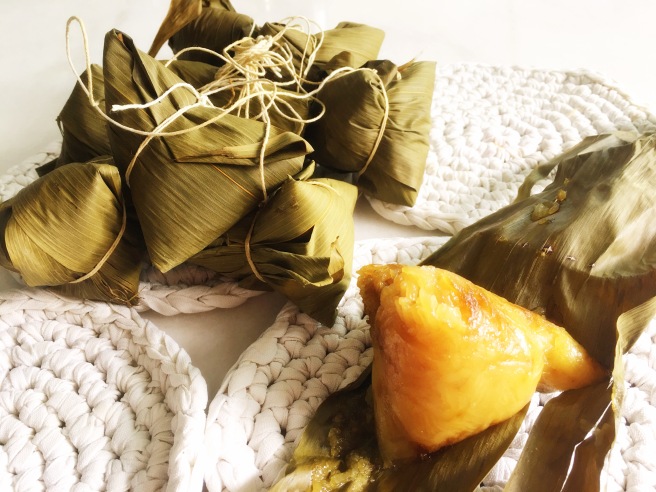
4. I make mine smaller coz you can’t eat this in large amount. Anyhow it’s limited by the size of the leaves. For that size, I would boil mine in a large pot for about an hour. Open one up to check that it’s cooked, if you want, to make sure.
5. Drain it and let it cool. It can be kept in the fridge for a few days.

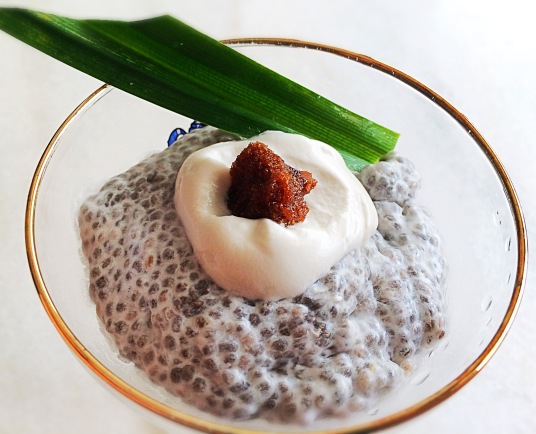
You can eat it with honey, gula Melaka, brown sugar, kaya. For me, I’ve always eaten it with white sugar. Unless it’s stuffed with red bean paste, then it can be eaten on its own.

Total time it took for me to make this is about an hour to wrap and an hour to boil. Compared to the meat chang, it’s very fast.


Red Bean Paste

DCF9C76C-FF2A-4194-B7B9-CCBFB78D09D6So…. it’s really difficult to get red bean paste these days…. one would have to check that it’s the day which number is the same as the last number as one’s ID card… wear a mask, drive to the store, get a queue number…  if there’s more than 10 in the queue, you can’t hang around… wait around but don’t loiter 🤷🏻‍♀️… then when you finally get into the store, it’s out of stock.  So….

Here’s an easy way if one is desperate…

Red Bean Paste for baos

500g small red beans (soaked 12- 24 hours)

300g of sugar (or to taste)

Pinch of salt

1. Before going to bed that night, cook beans in slow cooker.
2. Wake up next morning to the wonderful smell of soft red beans.
3. Remove the beans, saving the soup for … red bean soup for people who don’t like the beans in the soup.
4. Put the drained beans in a pot with 300g sugar and pinch of salt and as you boil, stir and mash. If you have pandan leaves, put in some.

5. When it looks dryish to you, turn off the fire. As it cools, it will get drier.

You can use it in buns, baos and prata. Hey, you can even make red bean soup. Just add water!

Agar-agar

9BA62E05-1B1C-44E6-81B1-A1C954EFB590

I have been making loads of agar agar jelly. It’s so refreshing on a hot day.

Usually people would buy a small sachet of agar agar powder that’s about 10g each. That will yield about 1 liter worth of agar agar jelly. 1 liter worth of agar agar really isn’t much. So look what I bought!

2E44CD0C-1D01-4CC5-BAD2-92A217B541E9

That’s, erm, 700g. That’s like, erm, 70 sachets… To some, that sounds like a life time worth of agar agar. Maybe it is. Maybe it isn’t. Don’t judge. 😬

Anyhow, it’s not like I’m leaving it on the shelf to rot, so you can stop rolling your eyes, A. The expiry date is December 2020, so I have about 1.5 years to use it up. I have been making all kinds of flavor… soy milk, milk, coconut milk, strawberry, Milo, almond, lychee, longan…. the picture shows almond milk agar agar. Yum!

The recipe is very simple.

1 tsp agar agar powder

1 to 2.5 cups room temp water/liquid (more liquid yields a softer jelly)

1 Tbsp sugar per cup of water or to taste

Put the agar agar powder in a pot and pour the liquid in. Dissolves more easily this way. Add sugar. Bring to a boil. Doesn’t need to boil for long. I usually turn off the heat when it boils.

Pour into molds and leave to set. Agar agar sets without refrigeration but it’s nicer eaten cold. Not suitable for freezing though.

That’s it. So 700g? Easy.

Chia “Sago” Gula Melaka

image

Lemme just say this at the start. There are no sago in this sago gula melaka pudding.  All pure chia seeds.

Whenever I add chia seeds into the water, everyone gives me a face. And some how manage to sieve out the chia seeds when they drink it. 8( So I gave up trying to give my family good food.  Being stuck with A LOT of chia seeds, I had to come up with ways to consume them.  Decided to finally give chia seed pudding a go.  It was really good.  I had soaked them overnight in milk and I had it with maple syrup. Major Mmmm moment.  That was when I had a light bulb moment as well!  Coz they look like sago, kinda taste like sago (well actually sago has no taste, just like Chia), perhaps I can pull a fast one on my family! A fake sago gula melaka pudding, but no sago!

image

Well, they were suspicious coz of the color.  So I had to confess.  But they tried it anyhow coz of the gula melaka (we really love our gula melaka) and it received all 6 thumbs up!!  This is major YAY! Coz chia sago gula melaka doesn’t need any cooking AT ALL! *clap hands

Chia “Sago” Gula Melaka (serves 1)

1/8 cup chia seeds

1/4 cup water

1/4 cup coconut milk

About 1 tsp gula melaka

Soak the chia seeds in water and coconut milk over night.  Serve with gula melaka.  If you can’t get that, brown sugar, maple syrup or honey will do too.


Kueh Kueh

image

We love a certain nonya kueh known to us as Rainbow Kueh or 9-layer kueh or steamed kueh lapis.  Top layer is always a bright red, bottom layer is always white and in between we have beautiful rainbow colors. It is patiently steamed layer by layer until there are 9 layers.  To enjoy it, we peel off layer by layer and savor it one layer at a time.

We love it coz it’s chewy, sticky, sweet, coconuty (not unlike mochi in texture).  However, it’s usually full of artificial coloring.  Every layer is a different color.  We have to limit *sob our intake coz DD has eczema and we suspect artificial coloring and preservatives to be one of the main culprits.

OR! I could make it myself, leaving out all the bad but pretty coloring.  And put in some flax seed meal to boost up the nutritive value.    The result is not pretty.  But never mind the lack of rainbow colors, as long as it tastes good coz  we can always close our eyes when we eat! lol. Anyhow, DD gave it 2 thumbs up.  “It’s soooo yummmmy!” Her words, not mine. 8D


No-Coloring  9-Layer Kueh with Flax Seed Meal

180 g tapioca starch

20 g rice flour

1/4 cup flax seed meal

400 ml coconut milk

160 ml water

1/4 tsp salt

200 g sugar

pandan leaves

Boil pandan leaves with water for a few minutes, then discard leaves.  Stir in sugar, coconut milk, and the rest of the ingredients.

Grease an 8″square pan with coconut oil.  Prepare the steamer.  Heat up the pan in the steamer.  When steamer is ready, stir batter, spoon in about 100 ml of batter and steam 5 min.  Spoon in another 100 ml of batter on top of the 1st layer and steam another 5 min.   Remember to stir batter each time before using. Repeat this till all batter is used up. Steam 10 min for the last layer.  Remove from steamer and leave to cool.

There is a trick to removing it from the pan.  Use a piece of cling wrap and place it on top of the kueh.  Flip the pan upside down.  Now you are holding the kueh in your hand. Gently pry the kueh away from the sides of the pan.  The whole thing should come off easily and plop onto your hand. Viola!

Now, about slicing it.  It’s a sticky situation (pun intended, heheh).  There’s also a trick to slicing.  Using a large knife, position and press it down.  No sawing motions, please.  Just press down and it’s done.  If you don’t want to end up with a sticky knife, you may even put a piece of cling wrap on top and press your knife down.  It won’t cut through the cling wrap but will cut through your kueh. Viola again!

Remember to peel off each and every layer and savor it layer by layer.

Store leftovers in the fridge.  It’ll still be soft the next day.


Steamed Coconut Muffins – vegan


image

I like simple cakes.  Satisfaction level from eating simple cakes (cakes made by one bowl, one spoon method) for me is about 80%.  Satisfaction level from eating elaborate cakes (involves electric mixer) is about 90-100%.  Given that the difference is quite little, all things considered, I think I’d prefer to choose to make simple cakes. Ha ha.

Steaming cake is another way of “baking” for those who do not own an oven.  Think of it this way: instead of using dry heat, you’d be using moist heat.

One doesn’t need a special electric steamer to steam food.  You just need a big pot.  Fill it to about an inch or two of water.  Put in a steamer stand or if you don’t have one, make do with a bowl and then a plate on top of the bowl.  That’ll work too. Steamed food is healthier too as baking is one of the cooking method suspected to cause cancer.

This steamed coconut muffin is local fare.  We call it huat (read as ‘what’) kueh.  It’s basically a steamed muffin with a characteristic split at the top. There are various varieties and this is just a rich coconut version I came up with over the years.

Steamed Coconut Muffin (makes about 4-5 muffins)

40-80g sugar

130 g self-raising flour

130 ml coconut milk

1 tbsp coconut oil

1/2 tsp pandan essence/vanilla/coffee

A few drops of coloring

Mix everything together until well blended.  Then scoop batter into muffin cases.  Fill it up almost to the brim.  Then steam in rapidly boiling water for about 10 min.

It’s a really simple steamed muffin, easily put together with minimal fuss.  If you are craving for cake pronto, this is the one for you.   One bowl, one spoon and ready in about 15 min from start to finish.  Satisfaction level, 80%.


Kaya Kueh with Pulot Hitam

image

When I was young, this was my mom’s hit recipe. Everybody loved her Kaya kueh. She would get me to pound the pandan leaves to get its extract. It was hard work extracting pandan essence. The leaves don’t yield much juice. I had to squeeze the leaves really hard just to get that one little drop. When artificial pandan essence was made available, I was all over it. However, in recent years, I have realised that nothing beats the real deal.  However, I am still allergic to pounding and squeezing the leaves.  Instead, I would boil the leaves in a little water and use the water.  I think it works.

My mom’s recipe uses white glutinous rice.  I mixed mine with black because  I read that black glutinous rice is more nutritious than white.  The kaya (custard) part is usually green but I decided to go au naturel in my bid to cut down on unnecessary colorings and additives.  So it got it’s glorious yellow color from the egg yolks.

image

Pulot Hitam Kaya Kueh

300g (about 2 rice cups) black glutinous rice (soaked about 3 hours)

150g (about 1 rice cup) white glutinous rice (soaked about 3 hours)

500 ml thin/diluted coconut milk

1/2 tsp salt

pandan leaves or pandan essence

Mix all together and pour into a greased 8″ square pan.  Steam for about 1/2 hour or till rice is cooked.  Remove the pandan leaves. Then using a spoon, press down the rice firmly to kind of flatten them.  This step is to make the rice a bit compact to prevent the custard from seeping into the rice part (I found out the hard way).

Kaya (custard) part

6 eggs

3 tbsp corn flour

4 tbsp plain flour

425 g sugar

400 ml coconut milk

50 ml water (for boiling pandan leaves)

2 leaves or pandan essence

Boil the pandan leaves in the 50ml water.  Remove the leaves.  Then mix everything well together.  Pour the batter on top of the hot rice, through a sieve to ensure a smooth custard.  Then steam for about 1/2 h or until the custard is cooked.

Cool before slicing.

This makes an 8″ square pan size.  Which is plenty for sharing with about 6 -8 people. Depending on how many second helpings everyone wants, of course. 8D


Attap Chee Ice Cream (no-churn)

image

One of my favorite childhood ice cream is attap chee ice cream.  It’s light pink and has tiny pieces of precious attap chee inside…There’s also usually precious little attap chee inside. It is only available from the traveling ice cream man on his motorcycle with a mini freezer. To get this ice cream, we have to be on a constant ice cream man alert. When we hear the ling-a-ling-a-ling, that’s when we drop everything, grab our money and run downstairs to look for him.  The ice cream that he sells comes in  five flavors – durian, attap chee, cocoa, corn and red bean. Just so you know, our local traditional ice cream is not the rich and creamy type. It tastes more like diluted flavored milk. But it has its charm. You may have them either on a piece of rainbow colored sweet bread, a cone or in a cup. They are about a dollar each. I found out lately that the traveling ice cream man can be found hanging around outside school gates. So in an ice cream emergency, we can always look for them around schools at dismissal time.

I have always wondered why it is that we can get all the other traditional ice cream flavors in our supermarket except attap chee. How come it never occurred to anyone to sell attap chee ice cream at supermarkets?

Ah… Guess I just have to make it myself until someone else does. I tried looking for the recipe but couldn’t find it (I am beginning to suspect I might be the only one who likes attap chee ice cream!). Thus I have to make it up myself. I did find out that there is such a thing as no-churn ice cream. That’s good. I certainly don’t need another uni-tasker equipment in the kitchen.

So here is my take on attap chee ice cream based on my family and good friends’ feedback. This recipe follows the easy no-churn method.

image

Attap Chee Ice Cream

300 ml whipping cream

100 ml coconut cream

1/4 cup condensed milk

1.5 Tbsp rose syrup

1 tub attap chee (chopped)

Chill whipping cream and coconut milk in the freezer for about 1.5 hours.  Working quickly, whisk whipping cream until fluffy.  It shouldn’t take long.  Then add in coconut cream and continue whisking for another few minutes.  Add in condensed milk, rose syrup. By now it should look quite fluffy.  Lastly, fold in the attap chee.  Pour it into a container and freeze for at least 6 hours.

Yes. Must wait 6 hours.  If you can’t wait then….er…..Nothing. You just have to wait.  It will be the creamiest, smoothest, chockful of attap chee attap chee ice cream you’ll have ever eaten. It will be totally worth it.

This post is linked to the event Little Thumbs Up (October 2015 : Coconut) organised by Zoe of Bake for Happy Kids and Doreen of My Little Favourite DIY, and hosted by Jess from Bakericious.

Red Dates Longan Peanut Porridge

image

My Grandma used to make this special sweet rice dessert.  We call it Ow Ow Mui.  I know, sounds strange. Never knew why it has such a funny name.  She was Hok Chia and this was one of the traditional dessert that she would cook. It has to be eaten on the 29th day of the first lunar month for good luck.  On the day that we eat this, nothing negative must come out of our lips.  It’s happy porridge day, when nobody is allowed to scold anyone.  Over the years, I have searched for this recipe and asked around but nobody, apart from my mom’s family, has even heard of it.

Lately, my search on the internet led me to Taiwan. I asked my Taiwanese friend and she confirmed that they have a similar dessert minus the peanuts and it is for post-delivery.

My kids, my mom and I enjoy it very much.  On some days, we have it for breakfast. Some days, even for lunch. It’s no longer reserved only for the 29th day of the 1st lunar month.  To quote my mom:”I can eat it any time and every time.” Ya. So can I.

In the pre-convenience food days, my Grandma would cook from scratch using raw peanuts which she would boil for hours. These days I just pop a can of sweet peanut soup.  So that we can start eating sooner.

Ow Ow Mui (serves 2)

1 canned sweet peanut soup

1 rice cup glutinous rice (washed and soaked for 1 hour or overnight)

10 red dates (or more if you love it)

10 dried longans (or more if you really like it)

About 1/2 to 1 cup water

orange color sugar to sweeten

Put everything into a pot and bring to a boil. Simmer until rice is just cooked. Add water if porridge looks too thick.  I like it thick.  Sweeten with orange colored sugar.

Enjoy!